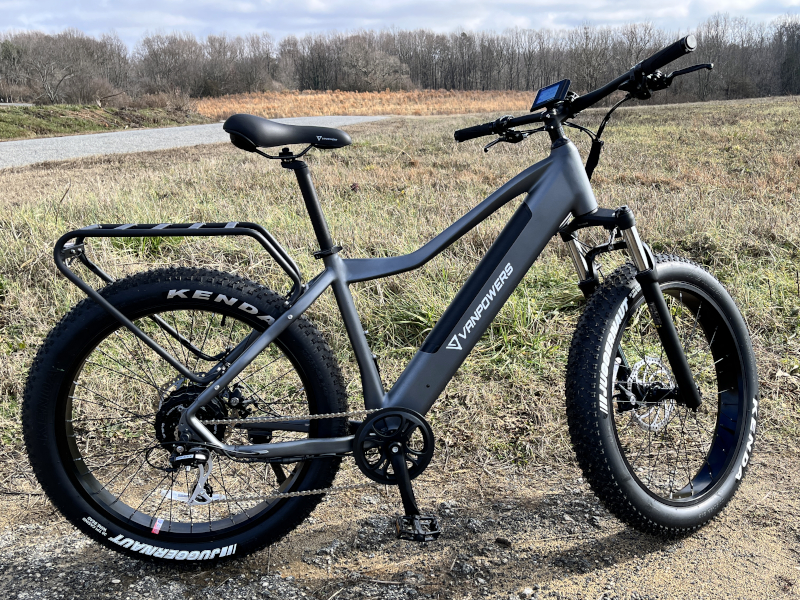
What is it?
What’s in the box?
- The bike frame with gears, rear tire, and rear rack attached
- Handle bars wired to the frame
- Front tire
- Bike seat
- Pedals
- Tools to assemble it (everything but a bike pump)
- Three different manuals
- A bell
- Two extra reflectors
- Charger with cable
- Keys for the battery
- Throttle
- Quick-release lever
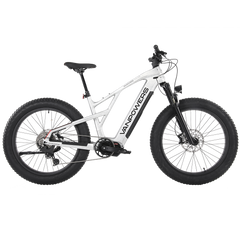
Hardware specs
- Max speed: 28 mph
- Mileage: 70 miles
- Ideal ride height: 5’4” to 6’2”
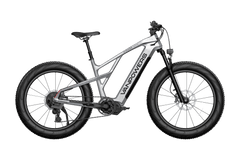
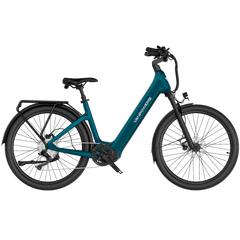
- Color: Gray
- Weight: 77 lbs
- Time to charge: 7 hours
- Max load: 264 lbs
- Motor: BAFANG® 750W 85 N·m Brushless Hub Motor
- Battery: 48V 14Ah/650Wh LG Cell Lithium-Ion Battery
- Digital display: KING-METER® SW-LCD Highly Sensitive LCD Display
- Charger: 100V–240V/2A Smart Charger
- Frame: 19” 6061 Aluminum Alloy Frame, 26” Compatible
- Tires: KENDA® 26” × 4.0” K1151 Juggernaut Sport MTB Fat Tires
- Rims: POWERCIRCLE® Aluminum Alloy Single-Wall Rims w/ 75 mm Width
- Front Fork: RST® Hydraulic Suspension Fork w/ 95 mm Travel and Lockout
- Brakes: LOGAN® Mechanical Disc Brakes w/ 203 mm Rotors
- Handlebar: UNO® 720 mm
- Stem: UNO® Rigid Stem, 60 mm, 0-Degree Rise
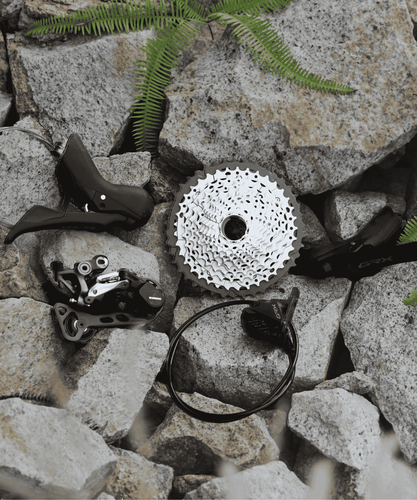
- Chain: KMC® Anti-Rust 8-Speed Chain
- Crank: PROWHEEL® 170 mm Crank
- Drivetrain: SHIMANO® Acera 8-Speed with 12-32T Cassette and 44T Chainring
- Saddle: SELLE ROYAL® A194 Freeway Fit Moderate Saddle
- Seat Post: UNO® 31.6 mm, 300 mm
- Pedals: Wellgo® MTB Version Pedals
Design and features
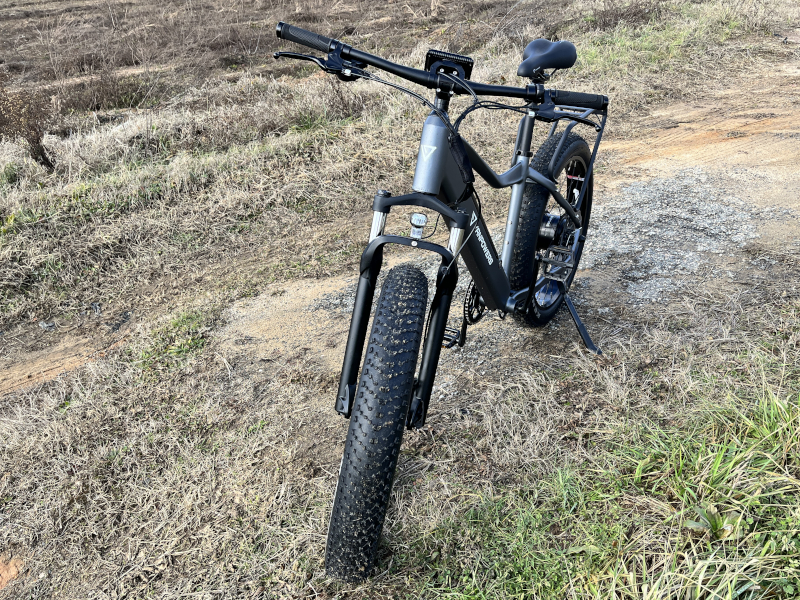
Setup
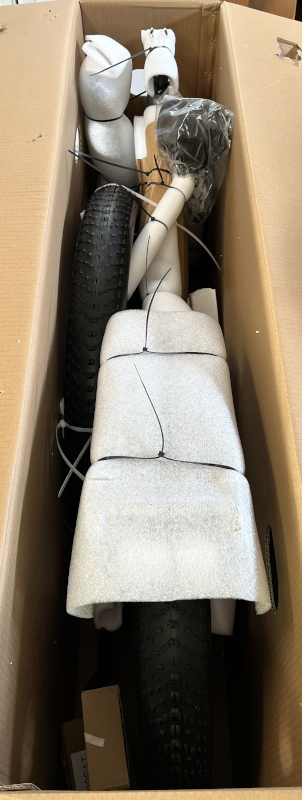
There were three manuals in the box, one for the battery, one for the RST, and one for the bike. The battery manual is written in poor English and doesn’t actually say anything of importance. RST stands for Rapid Suspension Technology, so the RST manual is for the suspension fork, essentially the shock absorbers for the front tire. It says things like, “This RST fork is fully assembled and ready to be installed onto your bicycle,” and “It is extremely important that your RST fork is installed correctly by a qualified bicycle mechanic. Improperly installed forks are extremely dangerous and can result in serious and/or fatal injuries.” That sounds serious, and I was trying to figure out exactly what I needed to install until I realized that the RST fork had already been installed by VANPOWERS. It would have been nice if they had bothered to mention this in their manual somewhere. The RST manual can also be ignored, except for the parts about adjusting the spring tension and setting the lock-out (more on these later).
The user manual for the VANPOWERS Manidae Fat Tire eBike is both good and bad. It has good English, the explanations are thorough, and the pictures are clear; we got the bike assembled. Unfortunately, it omits several things.
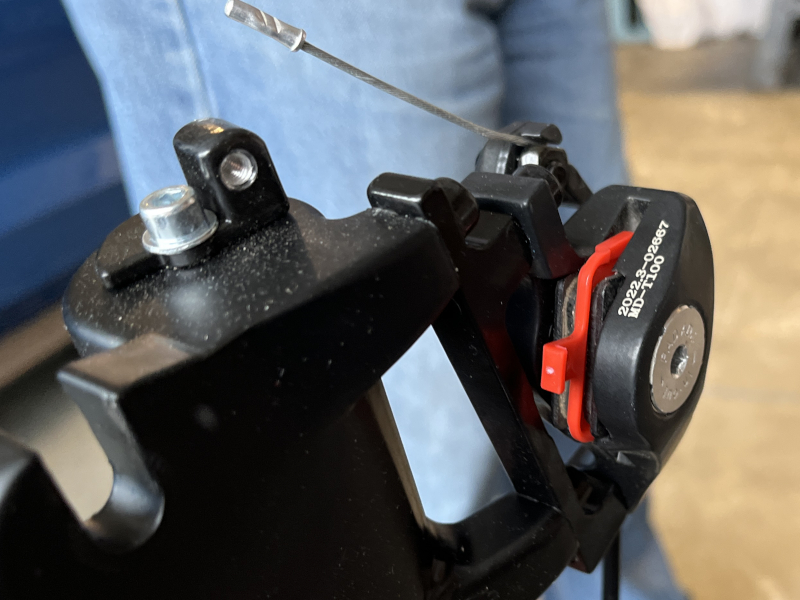
What do I do with the red protector in the brakes? How do I turn on the front and tail lights? What is the throttle for, and where do I install it? How do I use the display and reset the bike computer? Where and how do I install the bell? These kinds of omissions, some of which are pretty important, reveal that VANPOWERS is not as careful as it should be when it comes to the details.
Before doing anything else, I removed the VANPOWERS Manidae Fat Tire eBike from the box, found the charger, and plugged it into the wall and the battery. The manual states that the battery takes seven to nine hours to charge and recommends that I charge it for ten hours for the first three charges.
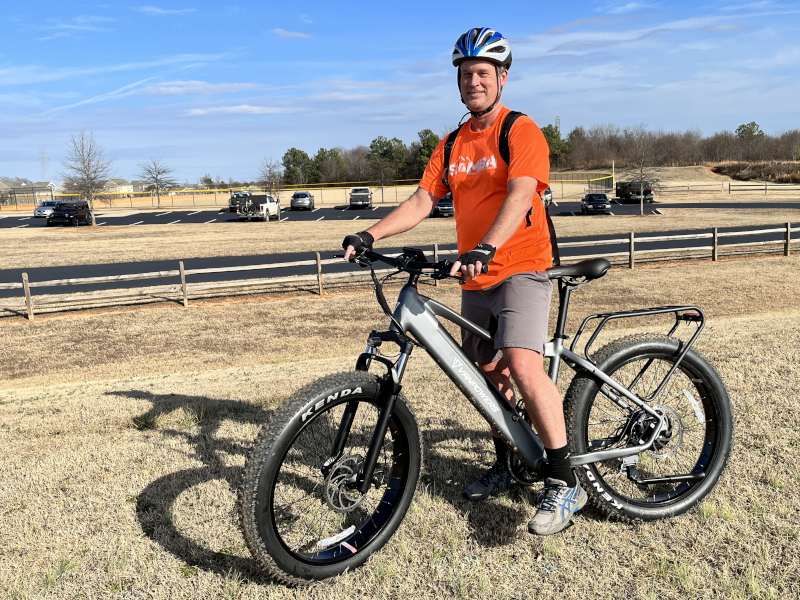
I invited my friend Chris Wert over to help me put everything together. Chris is an avid cyclist, both road cycling and mountain biking; he averages about 100 miles a week, often with local biking clubs. It was super helpful to have someone working with me who understood all the parts of the bike, how things should go together, typical settings and configurations, and what constitutes a quality bike part.
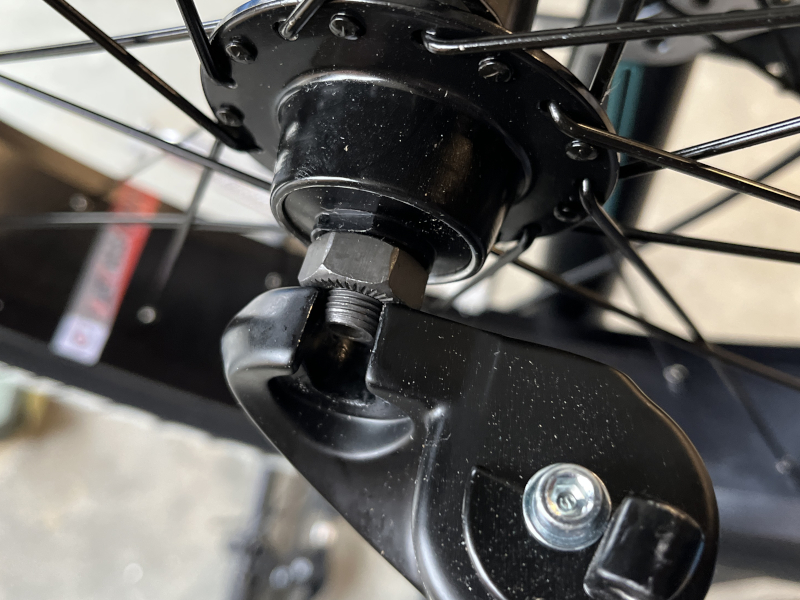
The first step in assembling the VANPOWERS Manidae Fat Tire eBike is to add the front tire and the quick release. We flipped the bike over, inserted the rotor between the brake pads, and then set the front axle onto the fork. The front axle seems too narrow, as it doesn’t rest fully on the front fork. It seems like it’s possible that a jarring bump might pop the axle out of position, leading to a very dangerous crash. We wish that VANPOWERS had designed the axle to be wider and fully resting on the fork. We then inserted the quick release bar for the front tire through the axle. This is a great feature to have, as it can make it easier to transport and store the bike, and we found that the release works well.
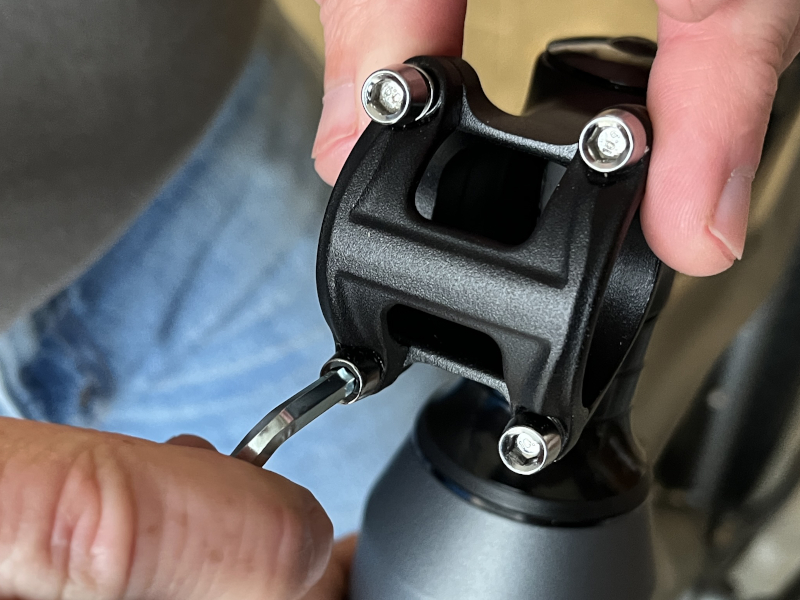
The second step is to add the handlebars. We removed the clamp using one of the included hex wrenches.
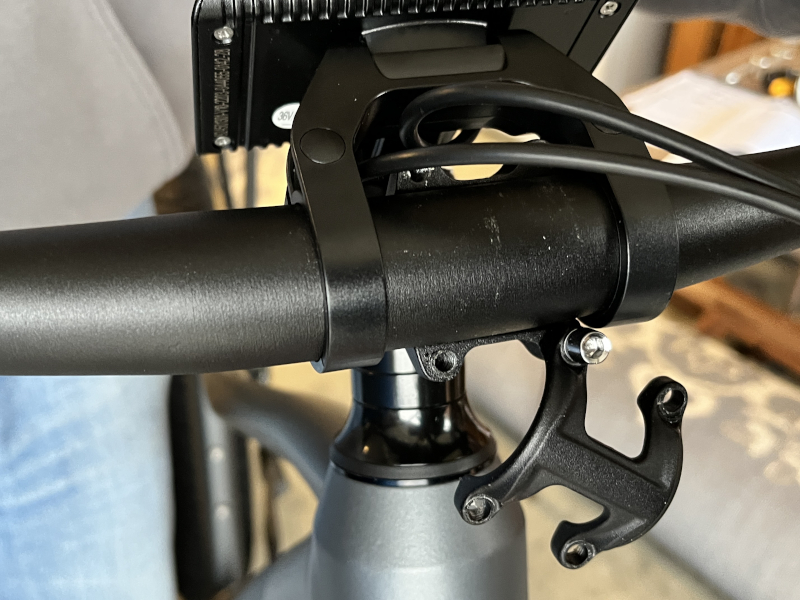
We set the handlebars in place and then reattached the clamp. The handlebars do not have a center mark, which would be handy for ensuring that we perfectly align the bars left-to-right.
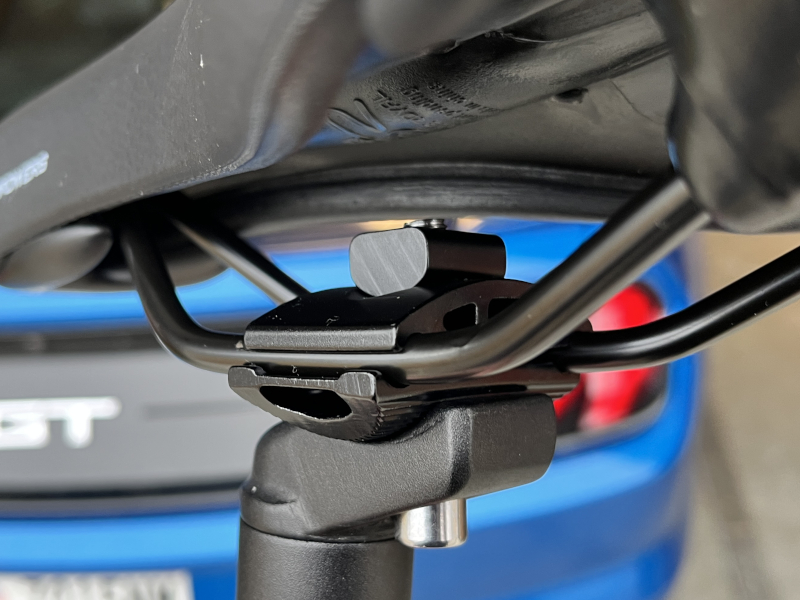
The third step is to install the seat. Before adding it, we loosened the nut under the seat and adjusted the tilt to a position Chris knew would be comfortable.
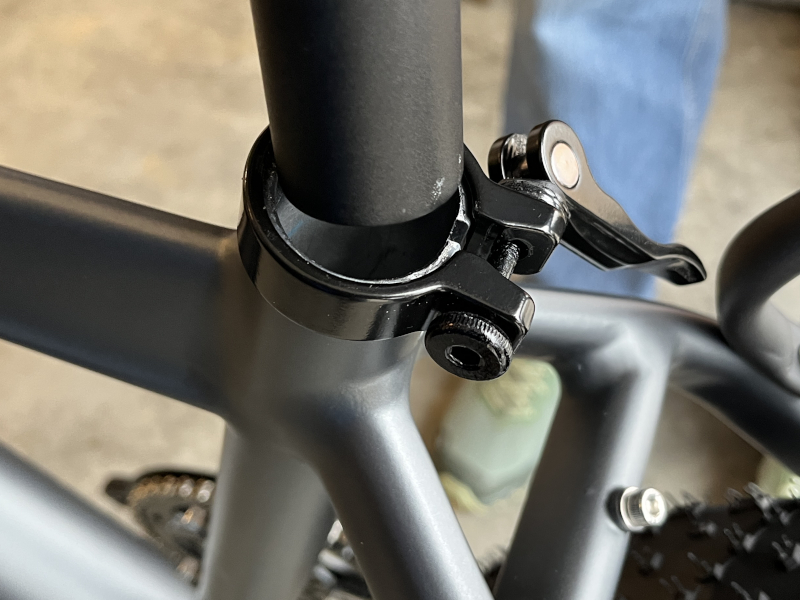
We then inserted the seat post into the frame. The post is only 10.5 inches long, which is fine for shorter riders but a problem for taller riders. VANPOWERS says that the bike is good for riders 5’5” to 6’2”, but we’re a bit skeptical of the upper end of this claim.
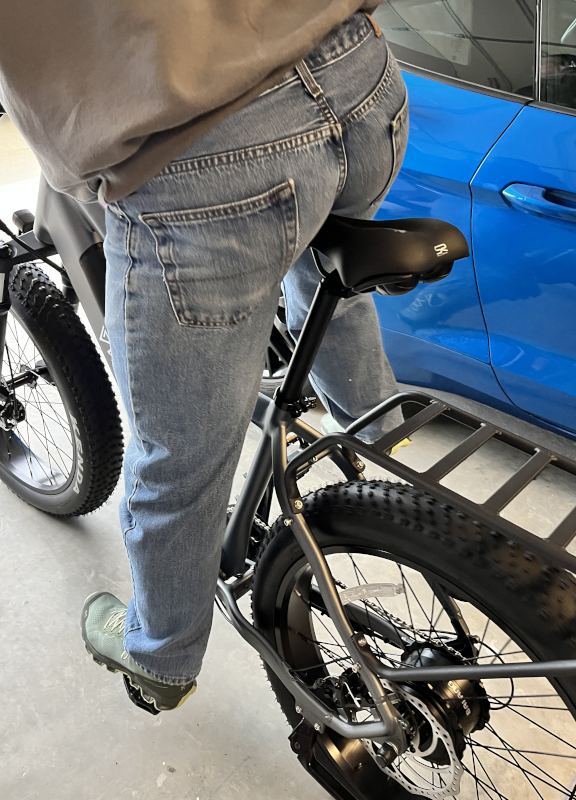
There is a mark on the post that identifies the tallest height at which it can go. Because a reasonable amount of the post must remain in the frame in order for the seat to be safe and stable, the short post of this bike means that it is probably better for riders who are 6’ or shorter. If you’re a taller rider, you’ll probably want to replace this seat post with a longer one.
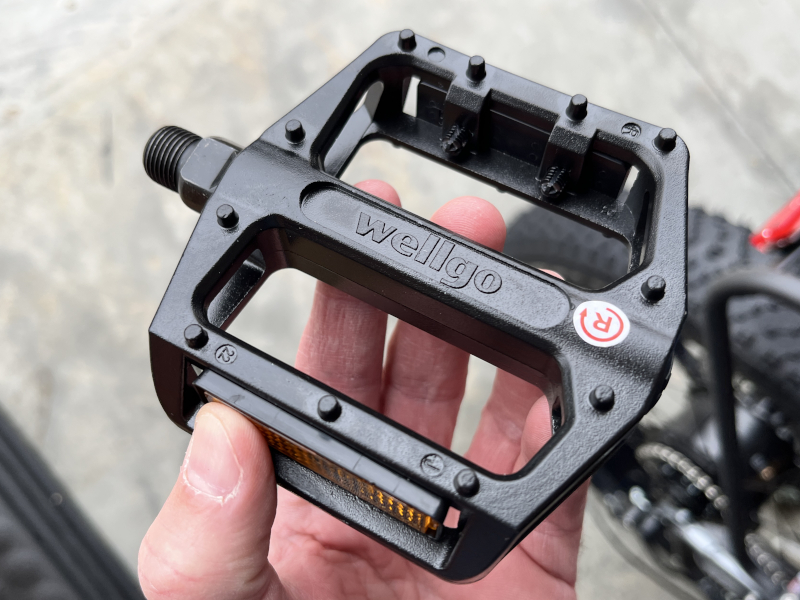
The fourth step to assembling the VANPOWERS Manidae Fat Tire eBike is to screw in the pedals. These are some very sturdy pedals that include solid studs for good grips. They are labeled for left and right, making it easy to know where to install them. More aggressive, technical, skilled riders will want to replace these pedals with clip-in pedals, but for most off-road riding, the included pedals are perfect. We did notice that the pedals did not rotate easily, suggesting a lack of lubricant, so WD-40 to the rescue.
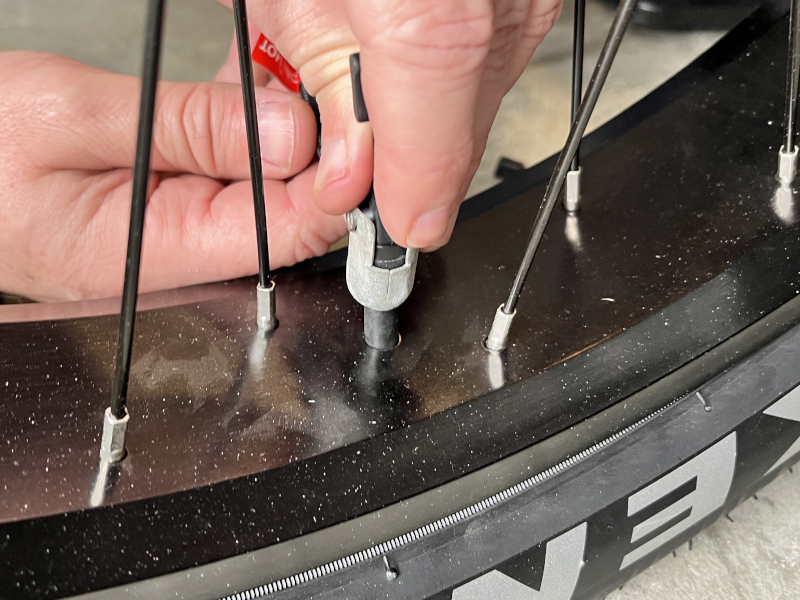
The fifth step was to use a tire pump to add some air to the tires. On the tires it says that they can be inflated anywhere from 5 to 30 PSI, which is a huge range. The lower end would be for riding on soft ground, like a beach, and the higher end for concrete. We split the difference and pumped them to 15 PSI. This worked well in all of our testing. The tires use Schrader valves.
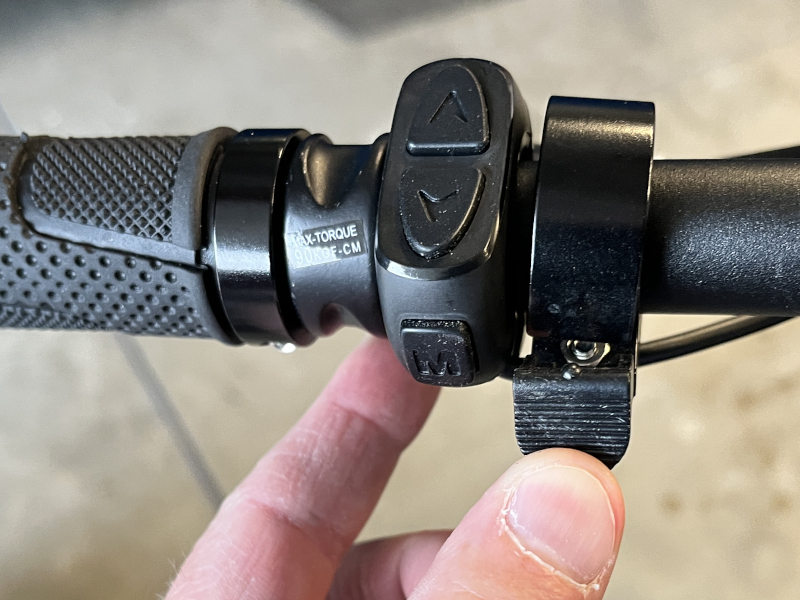
For our final touch, we added the bell to the left side of the handlebars, near the pedal assist switch. It’s simple, but it works. We didn’t time ourselves, but we estimated that it took the two of us just over an hour to assemble the bike while taking copious notes.
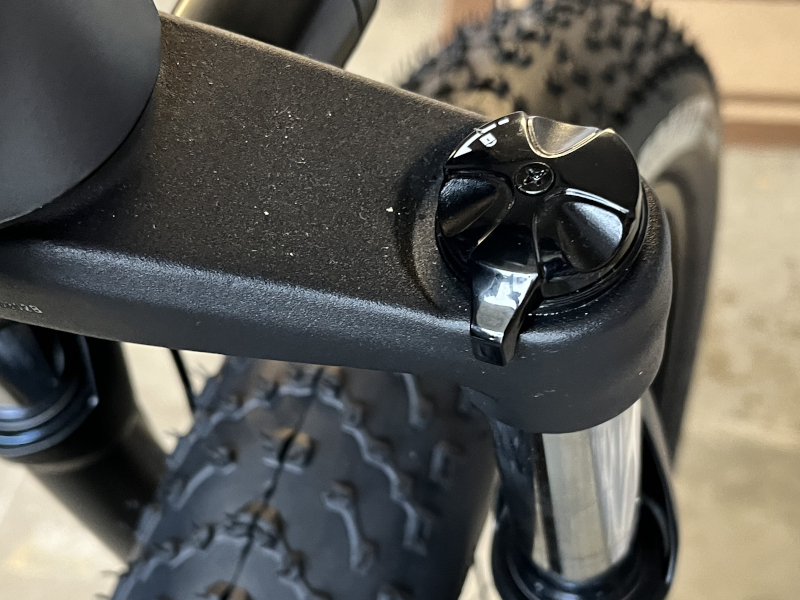
The VANPOWERS Manidae Fat Tire eBike is now ready to ride, though there are a few more things that we checked out. As mentioned above, the RST fork already comes pre-assembled, but there a couple of ways that it can be adjusted as per the RST manual. On the right side is the lock-out, which either allows or blocks (locks out) the suspension. For trail riding, we obviously want the suspension to be working, making our ride more comfortable; for longer road trips, especially if on a highway, we might want to lock it out.
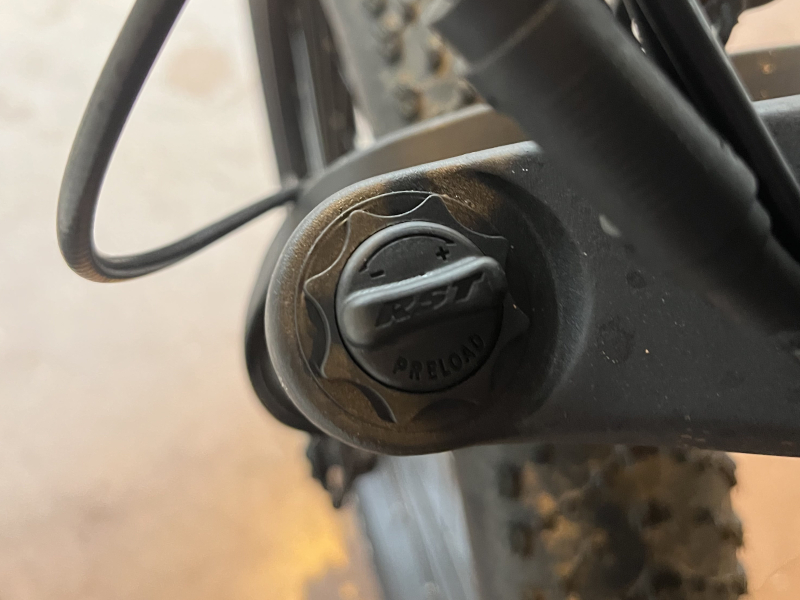
On the left side is the spring adjustment that controls how firm or soft the springs are in the fork. We left them at their factory settings for now. After riding for a bit, we might tighten or loosen them.
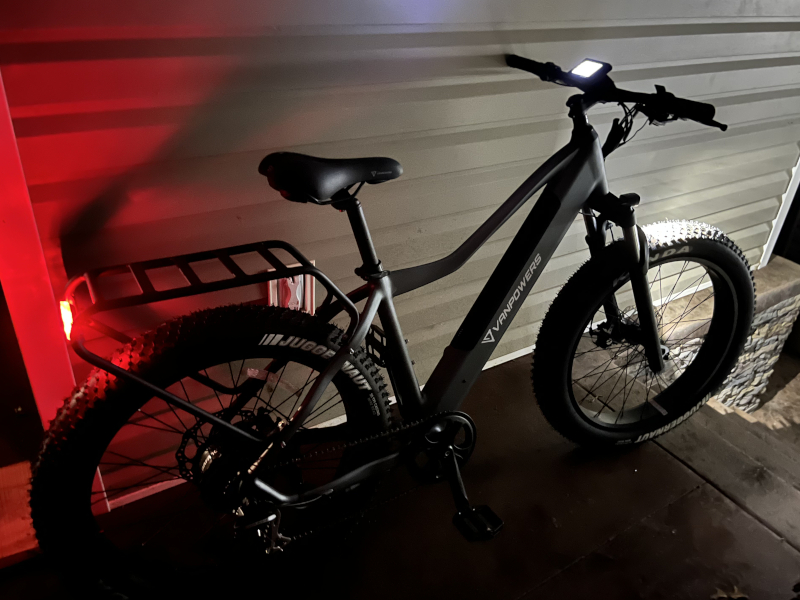
Through experimentation we figured out how to turn on the lights: Hold the upper pedal assist system (PAS) button for two seconds (more on the PAS itself below). This also turns on the backlighting for the display. Do the same to turn it off. The lights were surprisingly good, definitely brighter than we were expecting. We would be comfortable riding around our neighborhood at night, but if trying to ride a trail, we would prefer to have some additional lighting, including a helmet light.
The throttle is a way to turn on the motor without having to pedal; it’s what I like to call “cheat mode.” I’m no longer doing any work (pedaling); I’m just along for the ride (might as well get a motorcycle or a moped at this point). We added it after our first trail ride, and to be fair, I did find one helpful use for it: When I’m just starting out on a trail and it’s going uphill, the throttle helps me get going. Other than this, however, I never used it. There’s no way to attach the throttle without popping off one of the handlebars grips, and when Chris did this, the end cap broke. VANPOWERS either needs to pre-install the throttle for us, or they need a throttle that can be installed without removing a grip (like the bell).
We also discovered that the VANPOWERS Manidae Fat Tire eBike has a “walk up a steep hill mode.” Holding down the lower PAS button will power the bike. This is designed to help me walk the bike up a hill, one that would be too steep to push it up by hand. This came in handy during one of our rides.
As we built the bike, we noted several features that we were happy about.
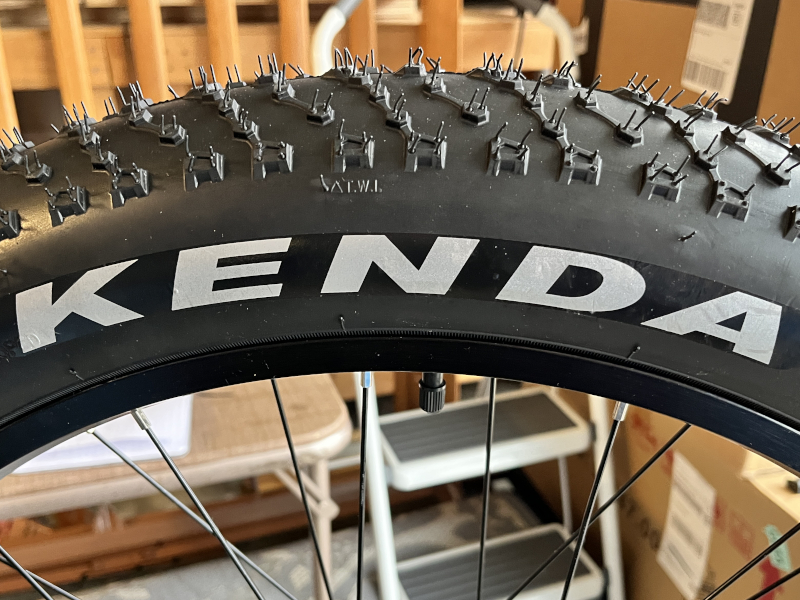
The tires are made by Kenda. The Sport tire is the low-end of the Juggernaut line. It’s a tube tire, but this should be good enough for trail riding. Although there is a tubeless version of the Juggernaut, the rims on the Manidae do not support it.
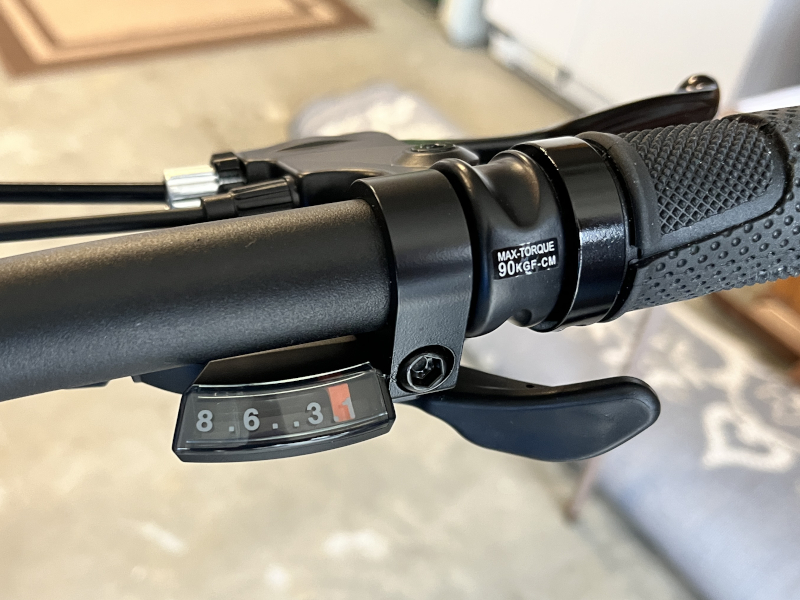
The VANPOWERS Manidae Fat Tire eBike has a trigger shifter, not a twist shifter. Trigger shifters allow more precision when shifting gears, ensuring that we can put the bike into exactly the right gear while riding, and I really like the one they used.
The seat post has a quick release, which makes it easy to adjust the height. This is especially helpful when switching between riders of differing heights and for removing during transport.
The rear tire appears to be very well-balanced, but the front tire has a slight wobble. This could be corrected with a spoke wrench, though this is not included with the bike. The front tire initially rubbed against the rotor, but a squeeze of the brakes fixed that problem. The distance between the break and the grip when fully applied is still about one-quarter of an inch, which is a good distance. A brake adjustment is not required out of the box, which is fabulous; in fact, the entire bike seems to be well lubricated, as we didn’t hear any squeaks. Nice job, VANPOWERS!
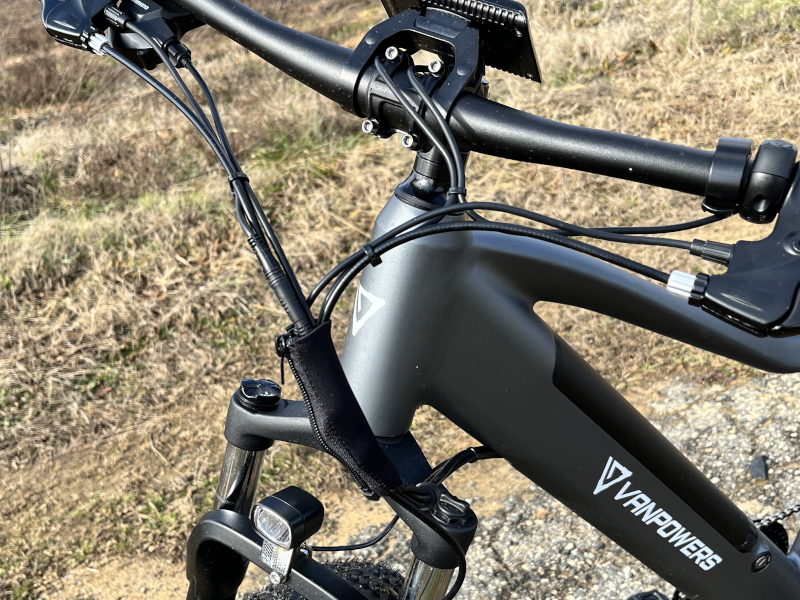
The cable management on the VANPOWERS Manidae Fat Tire eBike is very nice. Most of the bike has internal cabling, which reduces the chances of a cable snagging on a tree branch or rusting. It has a sleeve for some of the cabling on the front of the bike. Overall, it’s a very clean look that I like a lot.
The bike comes with a headlight and tail light as well as reflectors on the front, the rear, both tires, and the pedals. There are two additional reflectors that can be mounted in the front and the back, though we didn’t, as we felt there were plenty.
The Manidae comes with a kickstand, and it’s hefty! This bike weighs 77 lbs, so this is exactly the type of kickstand that it needs. We found that it worked great, whether parking the bike in my garage or on the trail.
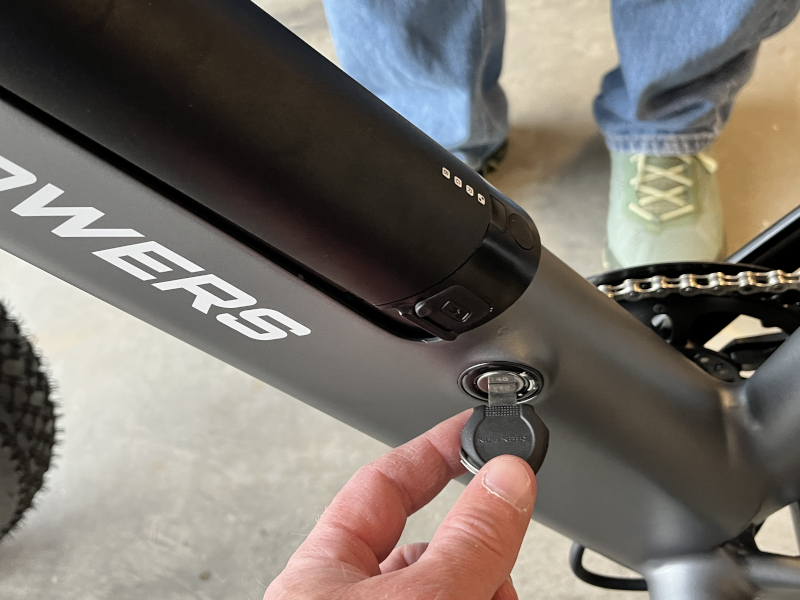
The VANPOWERS Manidae Fat Tire eBike includes a pair of keys that are used to remove the battery from its housing in the down tube. This is a great feature because it allows me to charge the battery anywhere I want and permits me to store it inside during the winter. Batteries don’t like to be left in the cold.
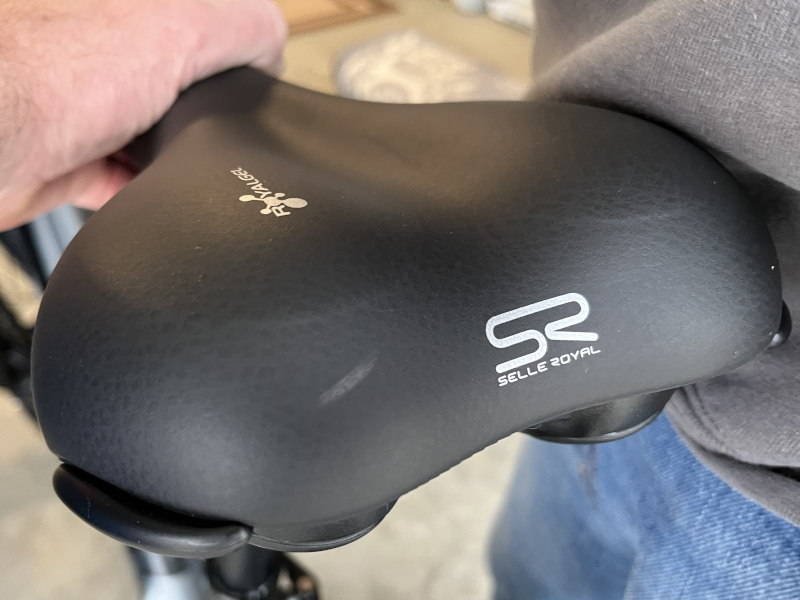
The seat on this bike is rather heavy, but that’s because it’s cushy. It is plenty comfortable when bouncing along trails.
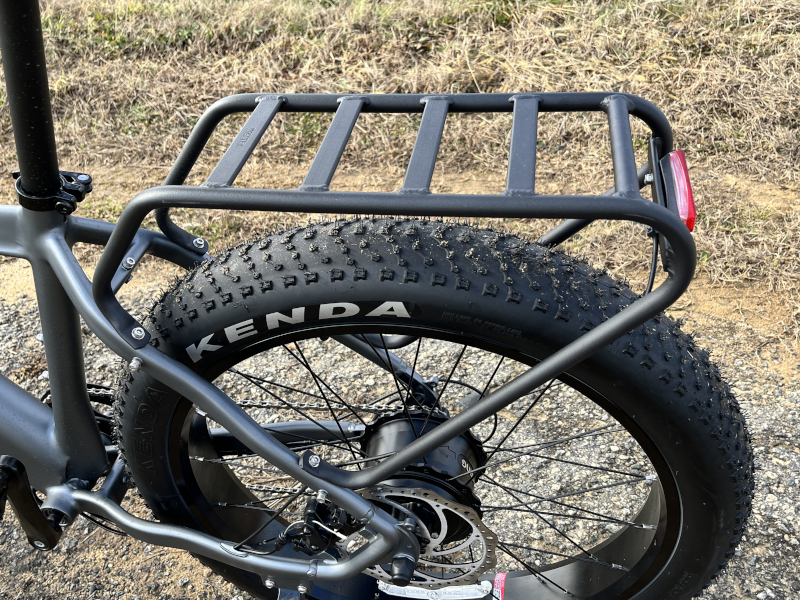
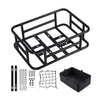
VANPOWERS included the rear rack on the bike they sent me for testing. It’s a $40 add-on, and I think that it’s a very nice addition for trail riding. It provides a wide, sturdy platform on which I could strap down a bag, some food, extra water, or a first aid kit. It would also be a big help for bikepacking.
There are screws for adding a water bottle cage, though no cage or bottle is included. Chris added one of his cages, but we ran into two problems. One, the screws are too short; they were barely able to hold the cage in place, and that was not secure. Two, there’s not really room for a water bottle to be inserted into the cage. Because the top tube angles downward towards the seat, the length of the seat tube from the pedals to the top tube is too short to hold a bottle. When riding, we’ll need to either put a water bottle into a backpack or use a backpack with a water system.
We also noted a few features that we were not so happy about.
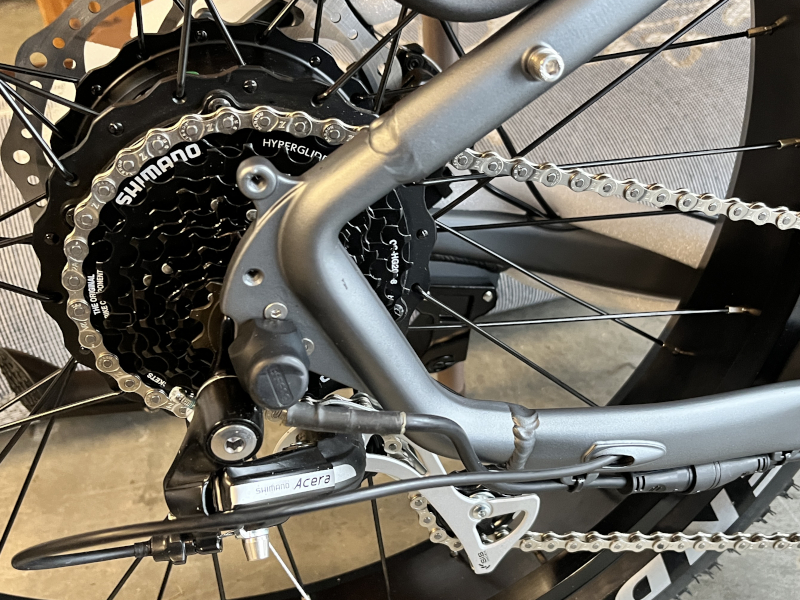
The welding job on this bike was very rough in some spots. If you look at the picture above closely, you’ll see some very ugly welding. We’re not sure if these pieces were not cut to match well, or if the welder just didn’t do a good job. Either way, it’s not pretty, though they are covered up with paint. Hopefully, these don’t indicate a weakness in the frame, but only time will tell that.
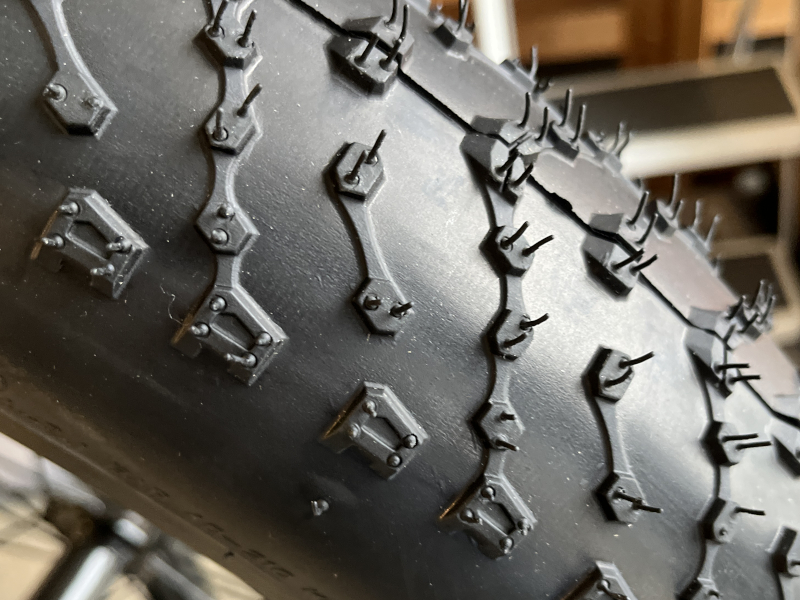
Looking at the tires, we noticed how small the nubs are. For general trail riding, which is what this bike is designed for, these Juggernaut tires are going to be just fine, an acceptable trade-off of traction and speed. If, however, we planned to do a lot of mountain biking with the Manidae, these tires are not going to grip very well.
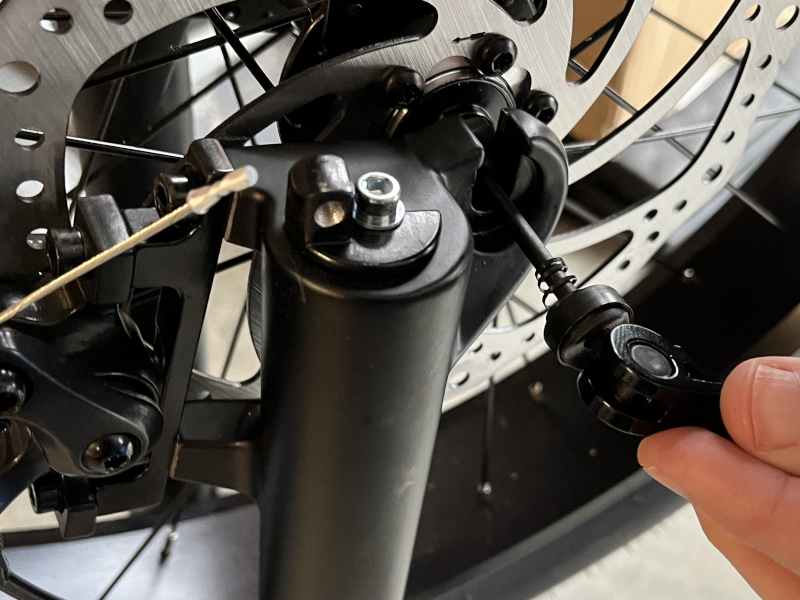
The quick-release bar itself is rather thin and flimsy, looking like it could snap. We wish VANPOWERS had made this sturdier.
Performance
There are two key features that define what this VANPOWERS Manidae Fat Tire eBike is and how it rides.
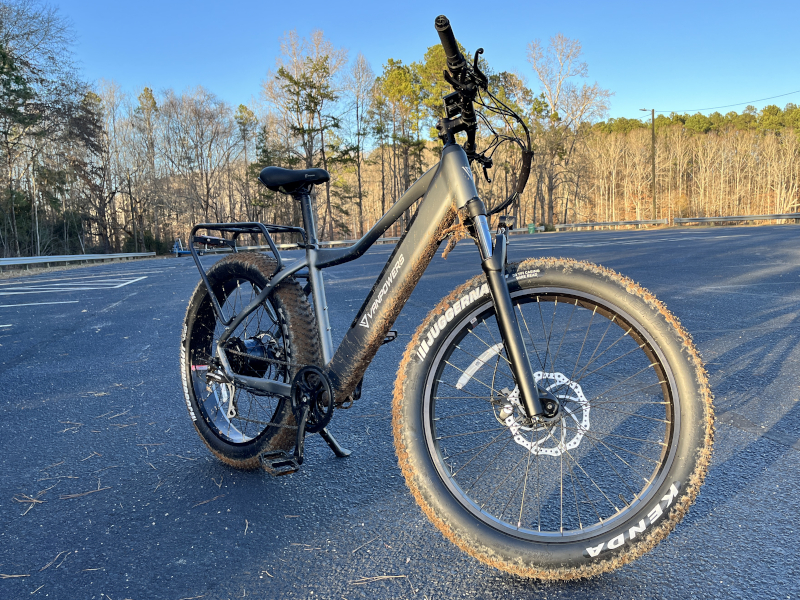
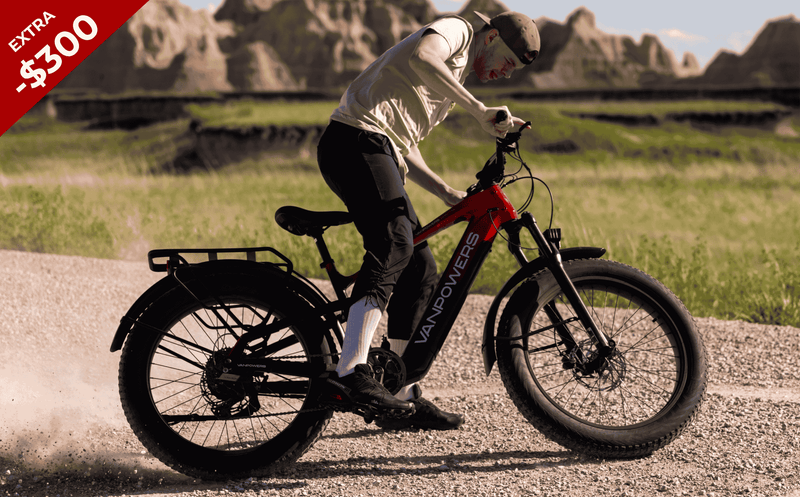
First, it’s a fat tire bike. That means it’s designed to go trail riding and will just roll right over nearly any obstacle that it comes to: bumps, gravels, hills, turns, mud puddles, sand, whatever. This does not, however, mean that it’s a mountain bike or that it’s made for technical mountain bike riding. It’s not. It’s an insanely heavy bike (77 lbs)—it’s three times heavier than a good mountain bike and needs to go on a serious diet—and it lacks a rear suspension. It’s perfect for trails, not rocky terrain. The fat tires and the extra weight result in great traction, even on gravel and loose rock.
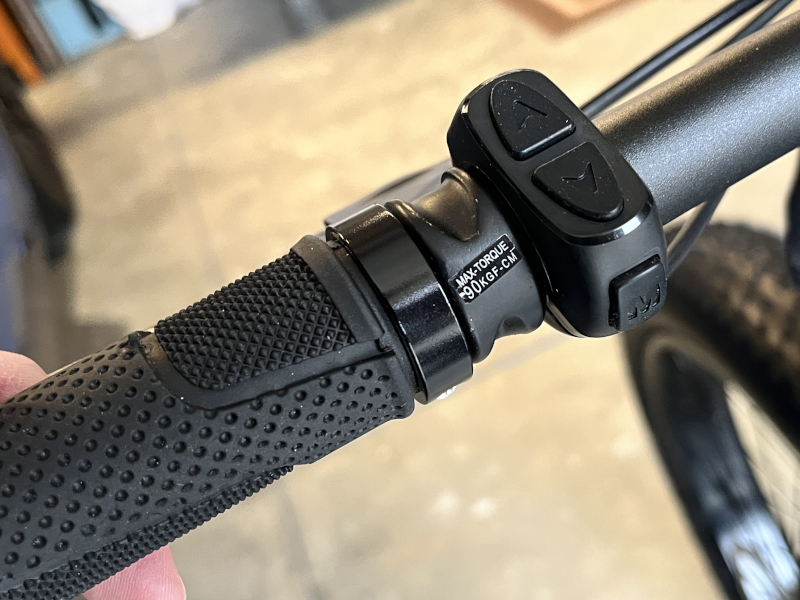
Second, it’s an ebike. That means it provides extra power whenever we need it, power that more than makes up for the extra weight. This is a good place to discuss its pedal assist. When the pedal assist is off, the Manidae is like any other bike: When I pedal, it goes. It’s completely up to me to provide the power that it needs. When pedal assist is on—it’s turned and adjusted using the up and down pedal assist buttons on the handlebar—it provides extra power. I pedal, and the assist, well, assists me; I get more out of it than I put into it. There are five levels of assist, and the higher the level, the more power the motor and battery provides. At level one, it’s a little extra help; at level five, it rockets me to 25 MPH and helps me stay there. Here’s the key to understanding how it works: When I pedal, it assists me; when I’m not pedaling, it doesn’t. It doesn’t matter whether I’m pedaling my hardest or pedaling lightly; so long as I’m pedaling, I get the extra help. It’s a beautiful system, and it works superbly in the Manidae. We really like it.
It is worth noting that there’s a max speed for the pedal assist. The manual says that it’s 28 MPH, but the speedometer on the bike says 25 MPH. Either way, it won’t help me go faster than that—this is the max speed that the motor is capable of—but that’s plenty fast enough!
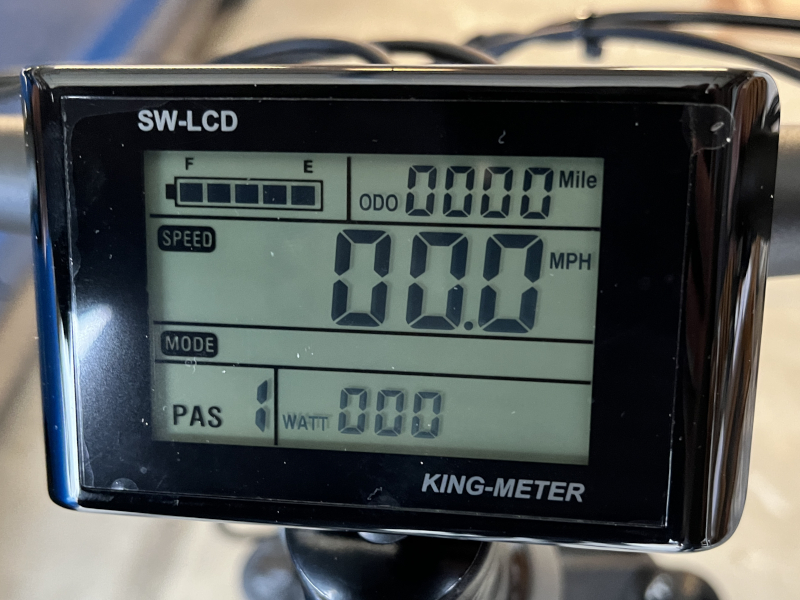
The display is nearly 4 by 2.5 inches, and it packs in a fair amount of data, including how much battery is left, an odometer, and the speed. The most important feature is probably the current PAS value, as we always want to know how much assist we are getting (kind of like keeping track of what gear we are in).
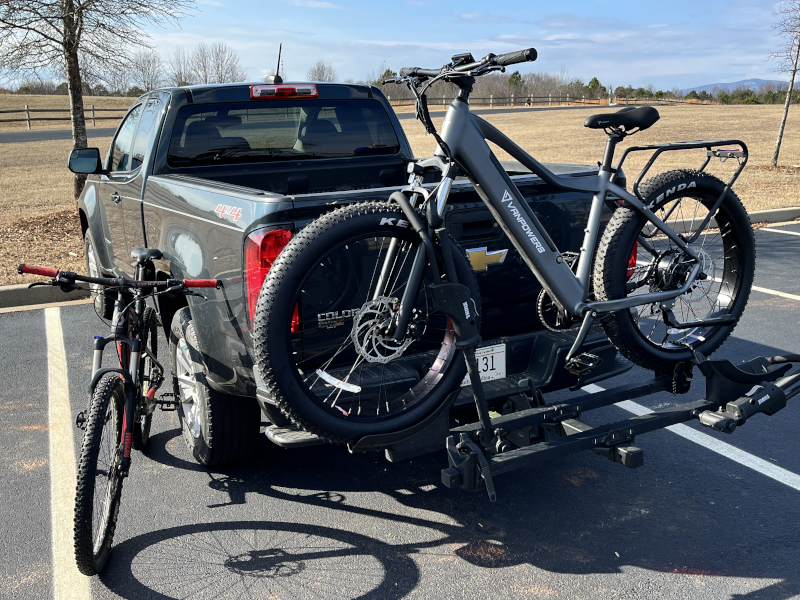
The VANPOWERS Manidae Fat Tire eBike is really heavy, which means that it requires an extra strong bike rack, and it might need two people to lift it up. The tires are so fat that the normal straps that Chris used to hold his bike in place didn’t fit all the way around them.
For our first trail test, we went to Holston Creek Park, which is considered an easy route. It features a short trail (2.3 miles) that has lots of sharp, hairpin turns with raised banks, small hills, a reasonably wide path, and a somewhat steep incline coming up the back side. It had rained a couple of days before, so there were a fair amount of mud puddles as well. In other words, this is the perfect first test for the bike. Our overall impression of the VANPOWERS Manidae is that it is an absolute blast to ride! I usually kept the PAS at level 2, and Chris at 3, trying to go as fast as we could while still keeping everything under control. We couldn’t help but smile and laugh out loud as we rode.
Despite having the PAS, we still got a workout on the Manidae. As someone who’s not really in shape, I found myself breathing hard a lot, which is exactly what I need. Even though Chris is in better shape and is much more skilled, when I rode the Manidae and he rode his mountain bike, I was almost able to give him a run for his money.
The more that I switched PAS levels, the less I liked the switch that VANPOWERS chose for this bike. The buttons are too small and thus too hard to find and press in the midst of the challenges of a trail. I wish they used a switch that was more like the gear shift, which I absolutely love. We’re going to change the angle of the PAS switch to see if that helps any. Chris really misses clip-on pedals, though I’m not experienced enough to notice. The brakes worked great, and we were really happy with them. We only had one problem with the bike: At one point the chain came off. We’re really not sure why, as it doesn’t seem to be too loose. We’ll have to keep an eye on this as we use the bike more.
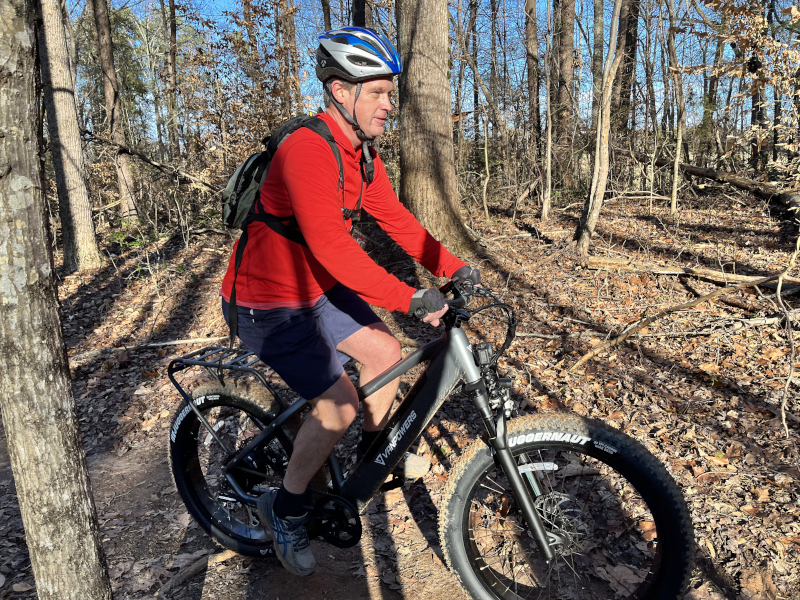
For our second trail test, we went to Lake Whelchel, a 7.9 miles loop trail that is considered moderately challenging. It has a lot of smaller roots and rocks in the path, steep inclines and declines, and a tighter path with trees close on either side. It’s a more technically challenging trail than Holston Creek. It was also a lot more fun to ride! We rocketed up and down trails, through huge mud puddles, and over the obstacles. This trail would have been very difficult for someone like me to ride on a normal trail bike, but with the VANPOWERS Manidae Fat Tire eBike it was easy and pure joy! The RST forks really shined on this trail as I rarely felt jarred when rolling over the roots and rocks.
We did run into a few issues, though nothing too bad. One, the chain fell off two more times, both when I had bottomed out and then hit a bump up; I was not pedaling or shifting gears either time. We’re going to have to take a look at the bike to try and figure this out, because it is a real problem. Two, the pedals on this bike are low, much lower than those on Chris’s mountain bike. This causes them to occasionally hit the rocks that I was riding over, which is known as a pedal strike. One of the pedal strikes was so hard that it nearly caused me to crash. Some of this can be alleviated with skill, knowing when to keep the pedals horizontal and which line to take. To really fix this problem, however, requires buying shorter pedal shanks, thus raising them higher above the ground. If you’re just planning to ride normal trails, this won’t be an issue at all; if you’re planning to do more mountain biking, you’ll want to look at replacing the shanks.
I rode on both the Manidae and on Chris’ mountain bike, and there’s a world of difference. Perhaps the biggest is that the mountain bike is so much lighter and nimbler; it’s easy to take exactly the line that I want on the trail. The Manidae lumbers along, and I often found myself fighting it to go where I wanted.
I did ask some questions by email of VANPOWERS’ support team, and they always responded within 24 hours, which is nice.
What I like
There are several things that I like about this bike:
- Marriage of fat tire stability and ebike power
- Sensible design
- Good front RST forks
- Lovely cable management
- Agile gear shifter
- Bright lights
- Sturdy pedals with studs
What I’d change
There are a few things that I would change:
- A complete manual
- Better defined shifter for the PAS
- Longer front axle that completely rests on the forks
- Longer seat post
- Preinstalled throttle
Final thoughts
The VANPOWERS Manidae is a fat tire ebike designed for trail riding, though it can handle roads and easier mountain trails as well. It’s very heavy but also very stable. In the review above, I’ve detailed several concerns that we have with the bike, but despite that, here’s the most important thing that you need to know about this bike: It is an absolute blast to ride it on a trail! It doesn’t require great skill or perfect conditioning, which encourages normal people like me to get out of the house and into the parks for some fresh air and exercise.
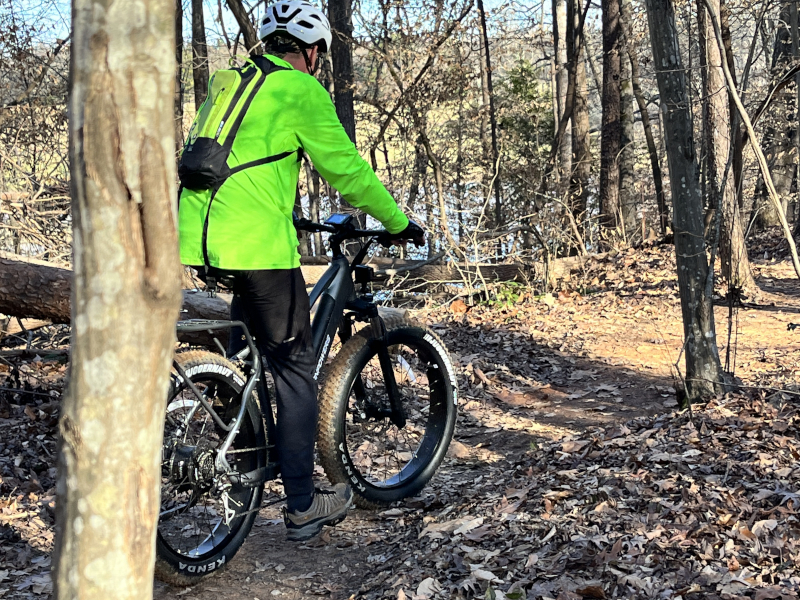
As I finish this review, I want to ask one final but important question: Who is this bike for? In general, this bike is perfect for anyone who just wants to have fun trail riding on a bike. The fat tires provide a lot of stability and traction, and the pedal assist just makes everything easier and faster. Additionally, I think it’s helpful for two groups of people. One, it’s perfect for anyone who needs an equalizer. If you have some friends who go biking, and you just can’t quite keep up, the extra power provided by the Manidae can help you hang with them. Two, it’s perfect for anyone who wants to go further. No matter how skilled or physically fit you are, everyone runs out of gas eventually; the Manidae can enable you to stay out later and bike further.
Price: $2039 (with the rear rack)
Where to buy: VANPOWERS’ online store
Source: The sample for this review was provided by VANPOWERS.
SOURCE:https://the-gadgeteer.com/


